Fly Rod Builds
Here are the fly rod builds I’ve completed:
10’ 3wt Euro Nymphing Rod
In order to get some practice with wrapping the rod, and familiarizing myself with the rod building process, I decided to build a lower-stakes rod to begin with. I used a 10’ 3wt “Euro Nymphing” style blank, and used a guide kit and thread to build it. These materials were on the more budget end, so I didn’t expect a whole lot out of this rod. However, once it was done and I started fishing with it, I was pleasantly surprised with the performance while euro nymphing, and even more surprised with the performance while overhead casting with it.
Finding the rod’s spine
In the blank-building process, typically any given section of the rod will bend more easily in one or more orientations (axially). The spot in which it bends the most is called the “spine” of the rod. When overhead casting, it’s critical that the spine is oriented in the direction of the cast, so that when the rod loads up, it will tend to bend in the direction of the cast. Since we are not doing an overhead cast with the nymphing rod, this is less important for rod casting quality, but is still important for the rod’s integrity (especially when fighting a fish). To find the rod’s spine, take any given section of the rod, rest the butt end on a hard flat surface, rest the tip between your thumb and index finger, and rotate it with your other hand while applying pressure to the middle of the rod. You should feel a certain direction(s) yield more, which is more obvious on smaller tip sections than butt sections. When you’ve identfied these sections, mark them at both the tip and the butt section of the rod. Finally, check the total rod’s spine by assembling the rod with the markings lined up, and adjust if necessary. These markings will be where the rod’s guides will line up when we start wrapping.
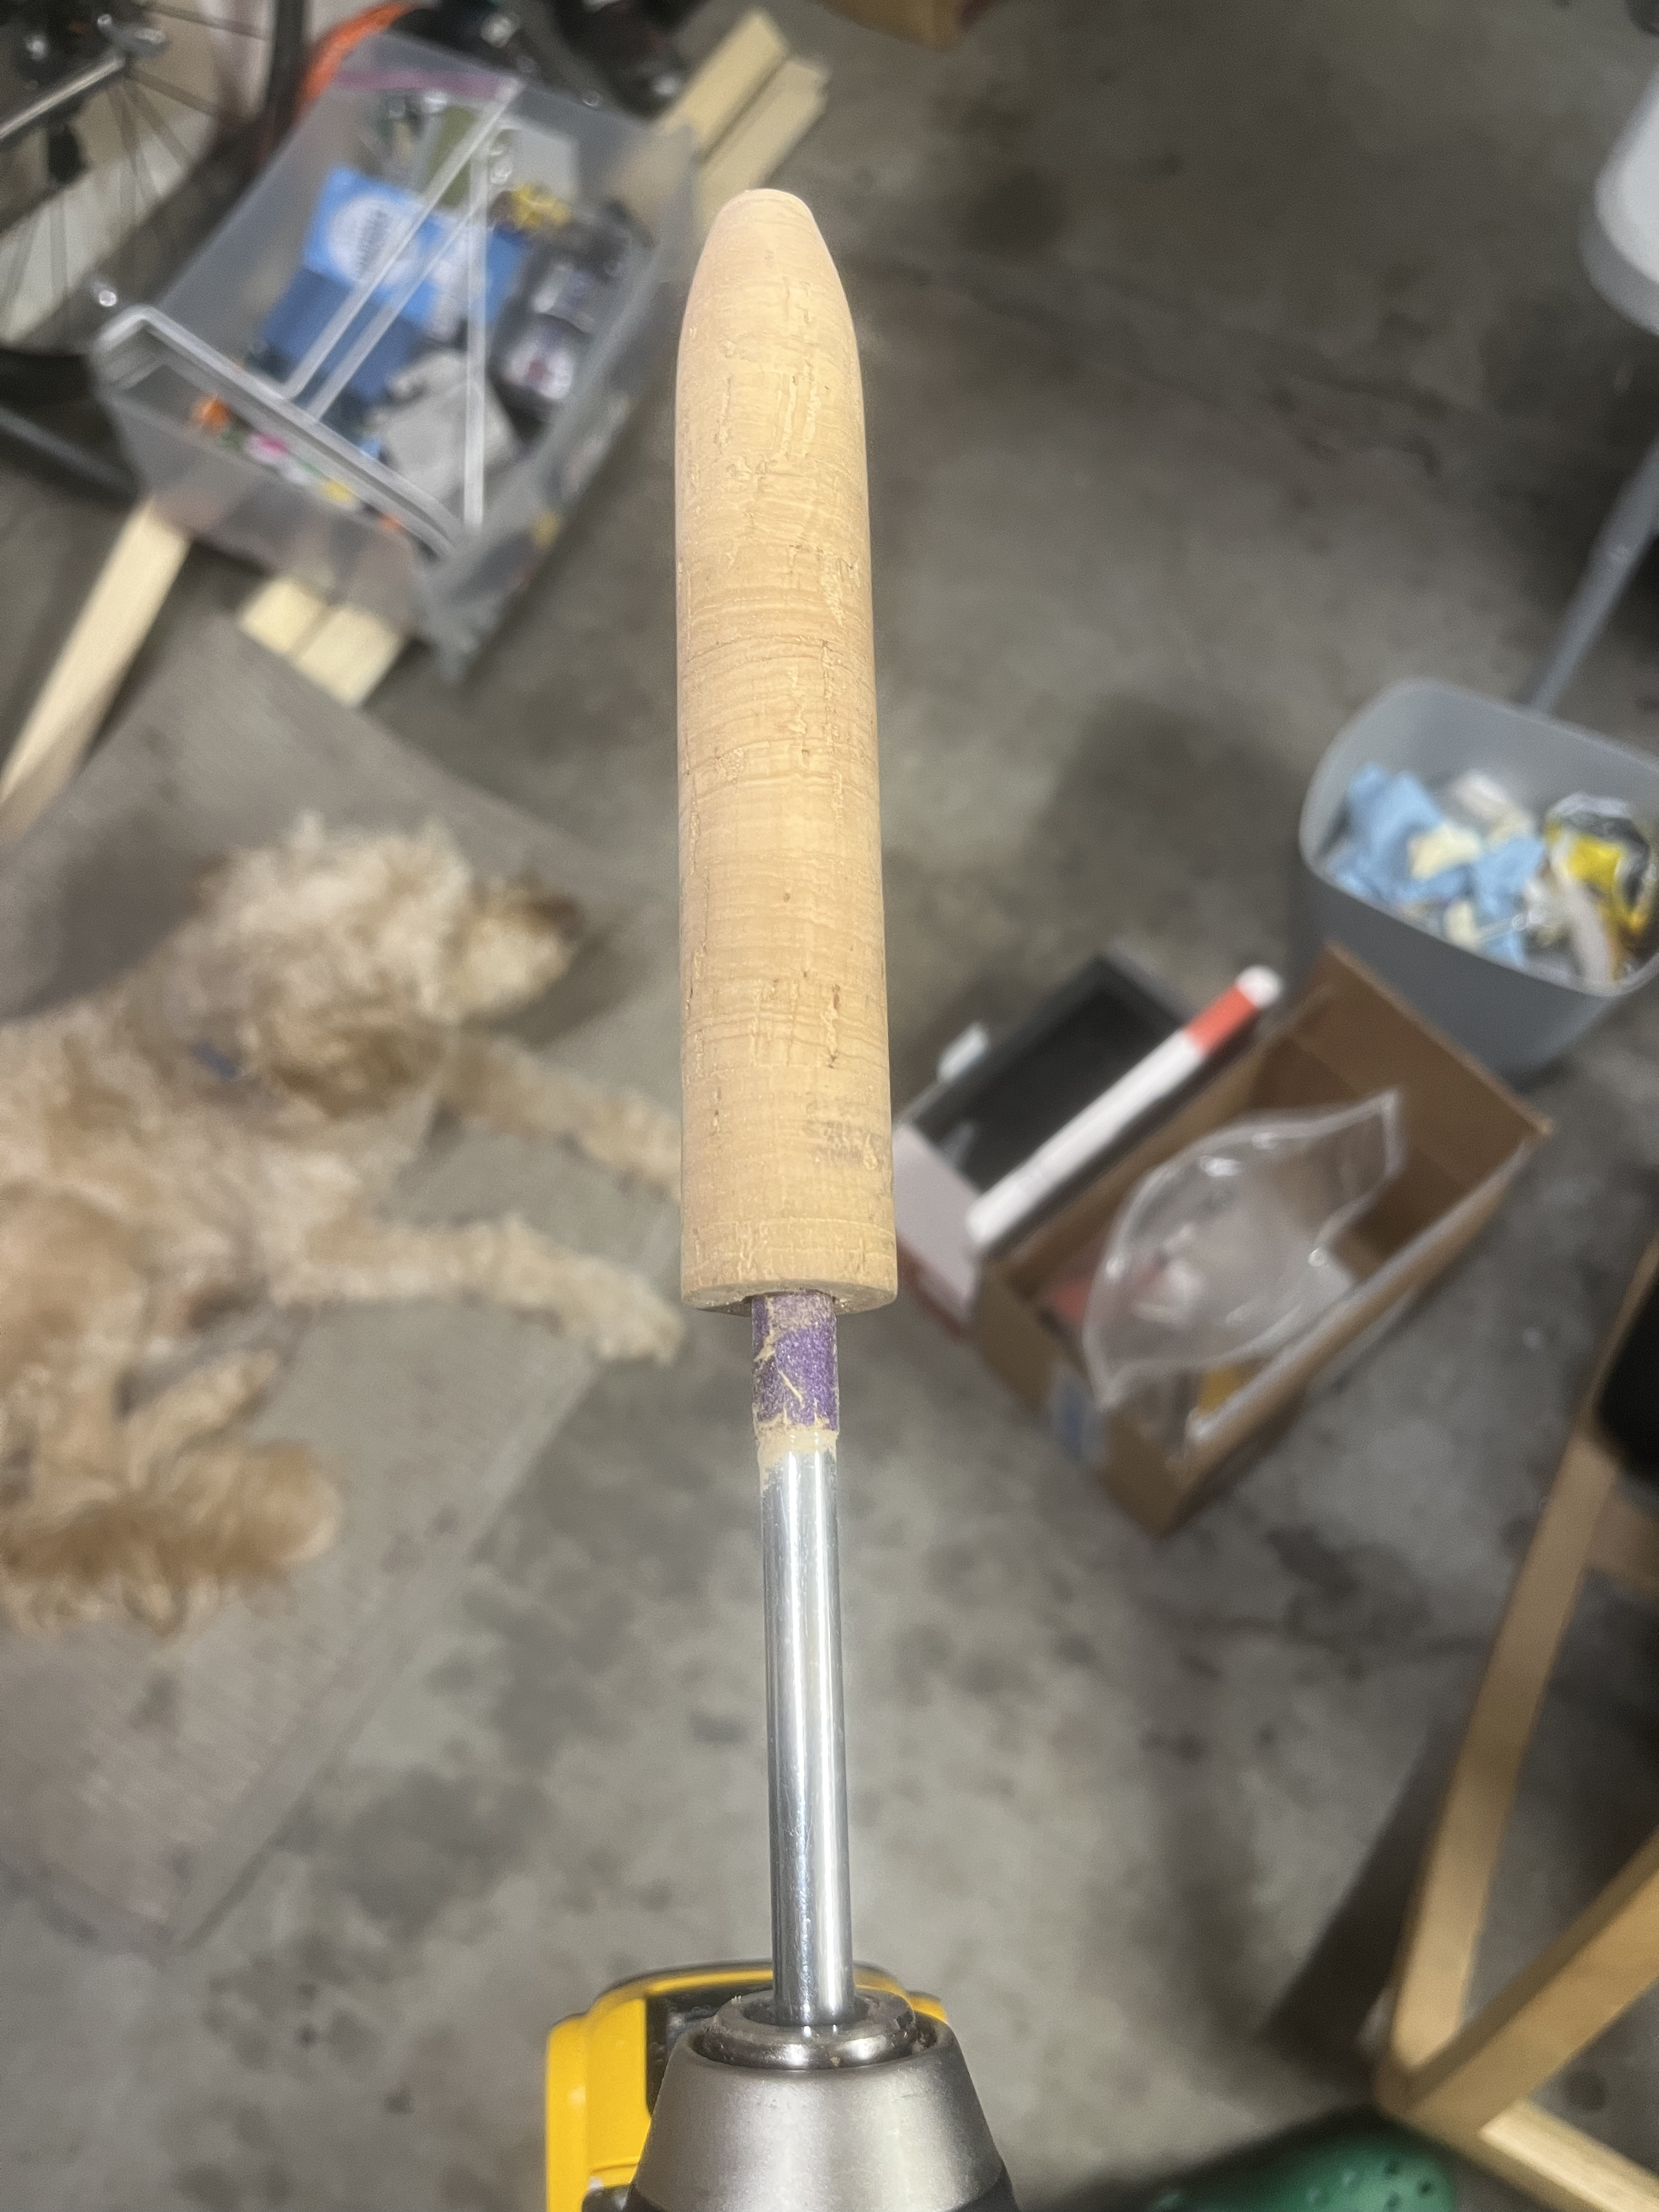
Reaming out the grip
Typically the grip comes pre-drilled, but in a smaller size than where it needs to rest on the blank. To ream out my grip, I used a piece of round bar that was close to the diameter of the grip, wrapped some sandpaper on it in the rotation of spin, and attached it to my cordless drill. This worked fairly well, and allowed me to get a snug fit on the grip.
Attaching the reel seat
To attach the reel seat, I first created some shims using masking tape. Originally I was apprehensive of this strategy to make shims, but it was pretty widespread to use this technique, and since I was going to be potting them with epoxy later, I conceded. The general strategy is to make two shims where the reel seat will rest that are just masking tape wrapped around the rod blank. I made sure that the shims fit snugly so that the reel seat wouldn’t move when slid on.

Once these fit fairly well, I glued on the grip. It’s common to add some decorative wrapping or a hook keeper right above the grip, so the grip (which only fits on one way due to the blank’s taper) and the seat need to be bonded beforehand.
Gluing the seat and grip
Since I don’t have a ton of options for adhesive, I ended up just using the same rod finish “Generation 4” epoxy to bond the reel seat and grip.
Finally, it looked like this fully potted:
Grinding the guides
Grinding the guides is an important step in the rodbuilding process that’s easy to overlook. As you are wrapping the rod, it’s important to get the thread to “walk” up the foot of the guide without a significant bump. To enable this, it’s best to grind the ends of the guides flat, even if they already come pre-ground. The goal is to create a taper that allows the thread to seamlessly “walk” up the guide. To do this, I used a cutoff wheel for my dremel, and painstakingly ground down a small amount of material to sharpen it.
Wrapping
Once the guides were ground down to provide a smooth transition, we are ready to mark out the guide spacing (using a guide spacing calculator like this). I used a wax china marker in red, since it provided good contrast and is easy to mark and remove. With the spacing marked out, then we can start wrapping. This is by far the most tedious part of the rodbuilding process, but it can be meditative once you get into the rhythm. For this practice rod, it was easier to wrap since the guides I purchased were single-footed. Single-footed guides often are known to be a little more fragile than snake guides, but after using them and building this rod, I think that only applies in higher-impact scenarios, not everyday fishing.
To start wrapping, I do the following:
- First, I make an “x” with the tag end in the direction of the wrapping
- Then, I do four to five parallel wraps, making sure to keep it tight with the tensioner.
- At this point, I like trimming the tag end down so that it stays out of the way and the bump it creates underneath the wraps is smaller.
- Then, I can wrap until we are at the guide foot, ensuring that the tensioner always has the incoming thread a little overlapping the previous winding, so that they are tightly packed next to one another.
- Once we are at the guide foot, more care needs to be taken so that the thread “walks” up onto the ground down surface evenly. Once it has walked onto the guide for a few turns, speed can be turned up until you are 8-10 turns away from being finished with the wrapping.
- Next, we need to add a loop of thread where we will be continuing wrapping, so that once we are finished, we can trim and pull the tag end through, effectively making it disappear underneath the existing wrapping. I like using around 6" of material to make this loop, so that you have plenty to pull on to pull the end through.
- Once the loop is placed with the loop towards the end of the wrap and the tag ends of the loop towards the beginning of the wrap, we can secure it in place by continuing our wrapping.
- Once the desired length of wrap is achieved, I then hold the wrap in place with my finger, cut the thread with about 2 inches of extra length, and thread it through the loop from the step above.
- Next, I pull the loop’s tag ends until the entire loop is under the existing wraps, and the tag end of the wrap is secured by the tension of the wrap. At this point, I trim the tag end of the wrap thread, maybe leaving 1/8in of length.
- Then, we can take the loop’s tag ends and pull them all the way out, which should result in the wrap’s tag end being completely hidden underneath the wraps.
Then, using this process, I wrapped all 10 of the rest of the guides. Since this was my first rod, there were some areas where tag ends were poking out.
Applying rod finish
Now that all of the wrapping was done, I needed to apply the rod finish. For this rod, I used the same “Generation 4” rod finish, which is a 2-part resin, mixed in equal parts. This rod finish is self-leveling, and is pretty easy to work with. I mixed two parts (measured with a syringe) into a clean mixing cup, and mixed for around 5m, ensuring that not too many bubbles were captured into the resin. Then, I took the resin an put it onto a small sheet of aluminum foil on cardboard (so that the exothermic reaction of the resin setting doesn’t speed itself up) and applied the finish to the wrappings using a small paintbrush. Once the finish was applied to all of the feet, I took a butane lighter to each one to get the resin to “flow” again, and then put it onto the rod drying jig.
Drying
I made a drying setup out of junk that I pulled from the dumpster - some slats from an old bedframe, a power supply, and an old drill motor. It isn’t on the level that a production rod spinner would be, but it provides a plenty good system to spin the rods and make the resin dry evenly. This allows the rod to dry unattended overnight, which is a huge boon.
9’ 8wt fly rod (for the big fish!)
Since I live in the Bay Area, we aren’t super close to very much good trout fishing. However, there is the ocean right out of our front door. In order to take advantage of this resource (and to catch some mondo stripers), I built three 9’ 8wt rods for my friends and myself, so we can go fish the surf. In addition, we are going on a trip to Alaska, where the fish are large and our 5wt rods would be very outclassed, so these 8wt rods would fit perfectly into our quiver to catch bigger salmon, trout, and char.
Requirements
- Can sling flies
- OK for both salt and freshwater
Parts
Blank
I briefly toyed with the idea of making our own blank, but quickly realized that it would be very difficult to have a blank that actually could cast well. We’d need to create mandrels for each section of the blank, and then layup some sort of woven composite or fiberglass on top. This would give us a rod, but not one that has any sort of “action” rating. We could end up with 1 slow, 1 medium, and 1 fast action, or any combination of the three. Given the prices of some of the blanks on the market, off-the-shelf blanks are the way to go, unless you have a plethora of time.
To keep costs down but still have a good-casting blank, I got some IM8 house brand blanks from Ye Olde English Fly Shop, in the 9’ 8wt size. These are fast-action blanks that have been reviewed quite well.
Guides
Originally, I thought about making my own guides with either stainless wire or titanium wire (harder), but eventually decided against it, since the cost of making the jig, the complexity of grinding the feet of every guide, and ensuring that the resulting guide was hard enough was going to take too much time. These rods have a deadline, so I ordered some “TiForged” snake guides off of mudhole.
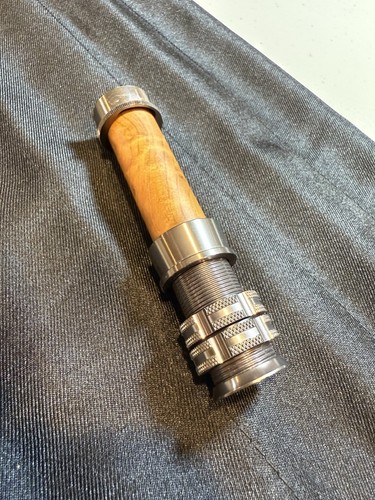
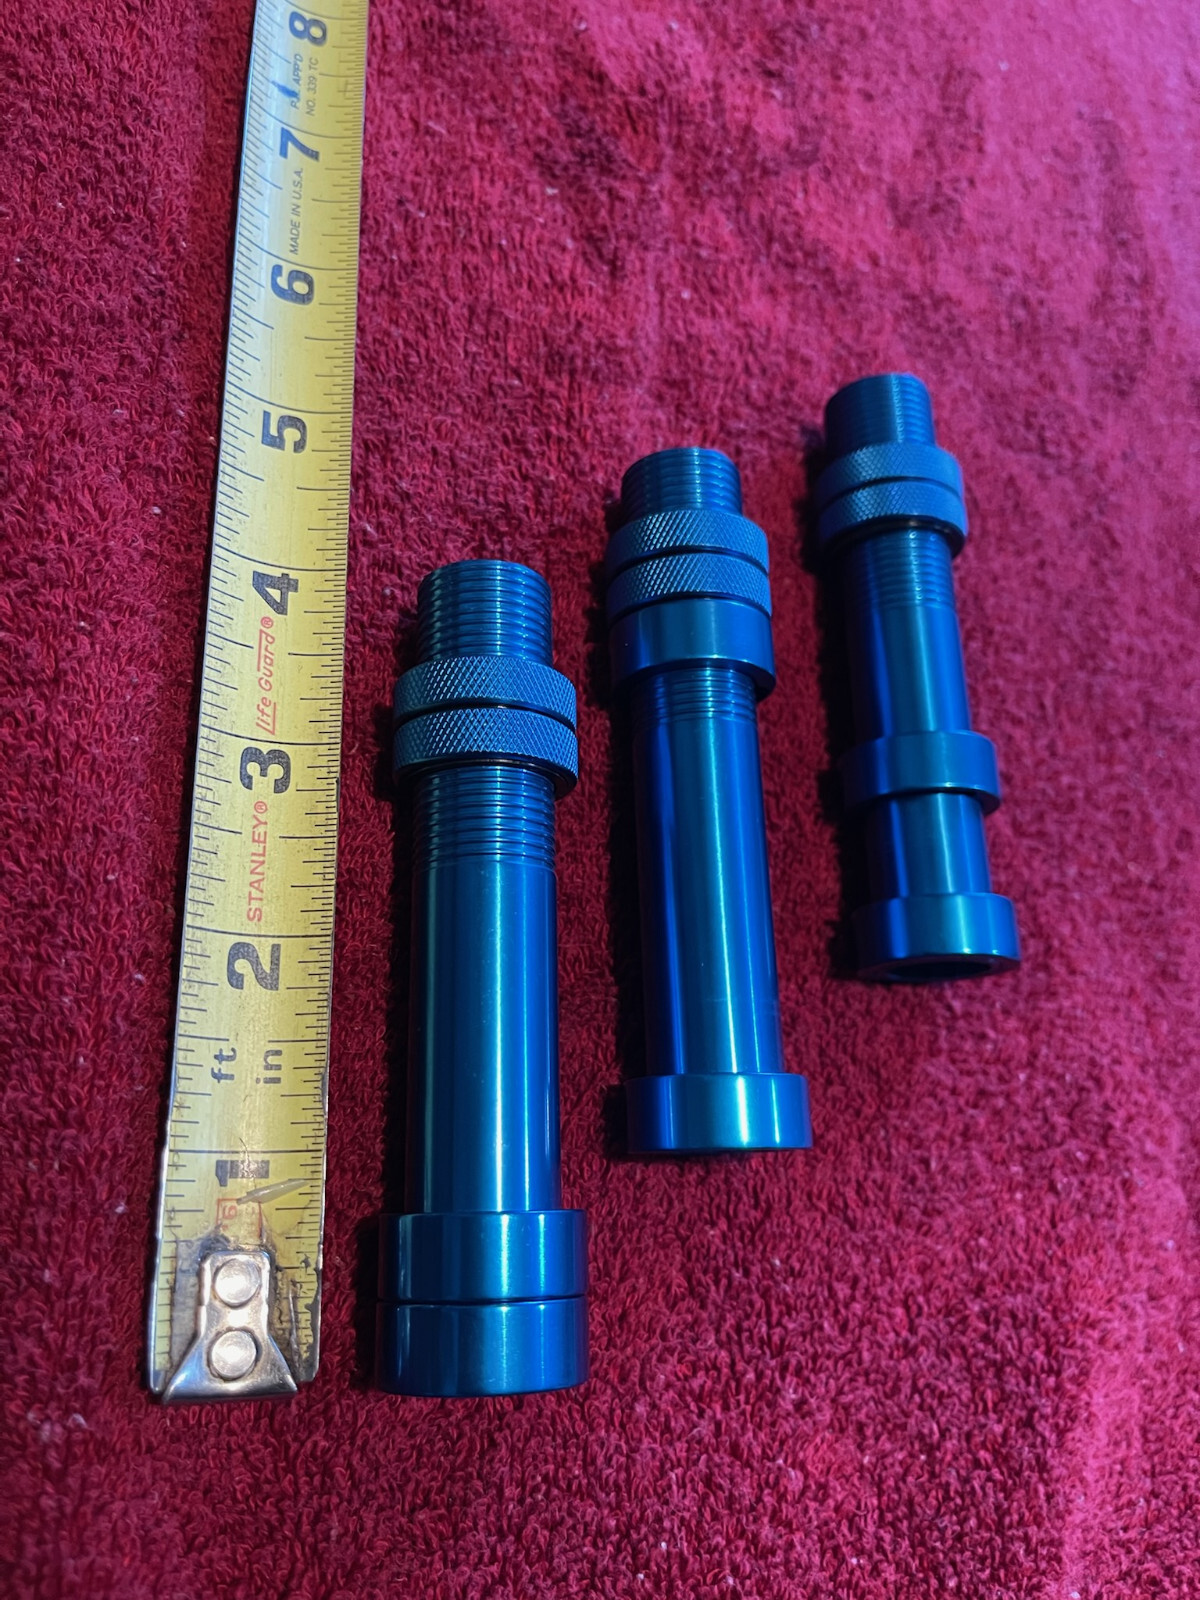
Reel Seat
Since two of these rods are gifts, I opted to buy two nicer seats for the gift rods, and some anodized aluminum ones for my rod. I originally ordered these reel seats:
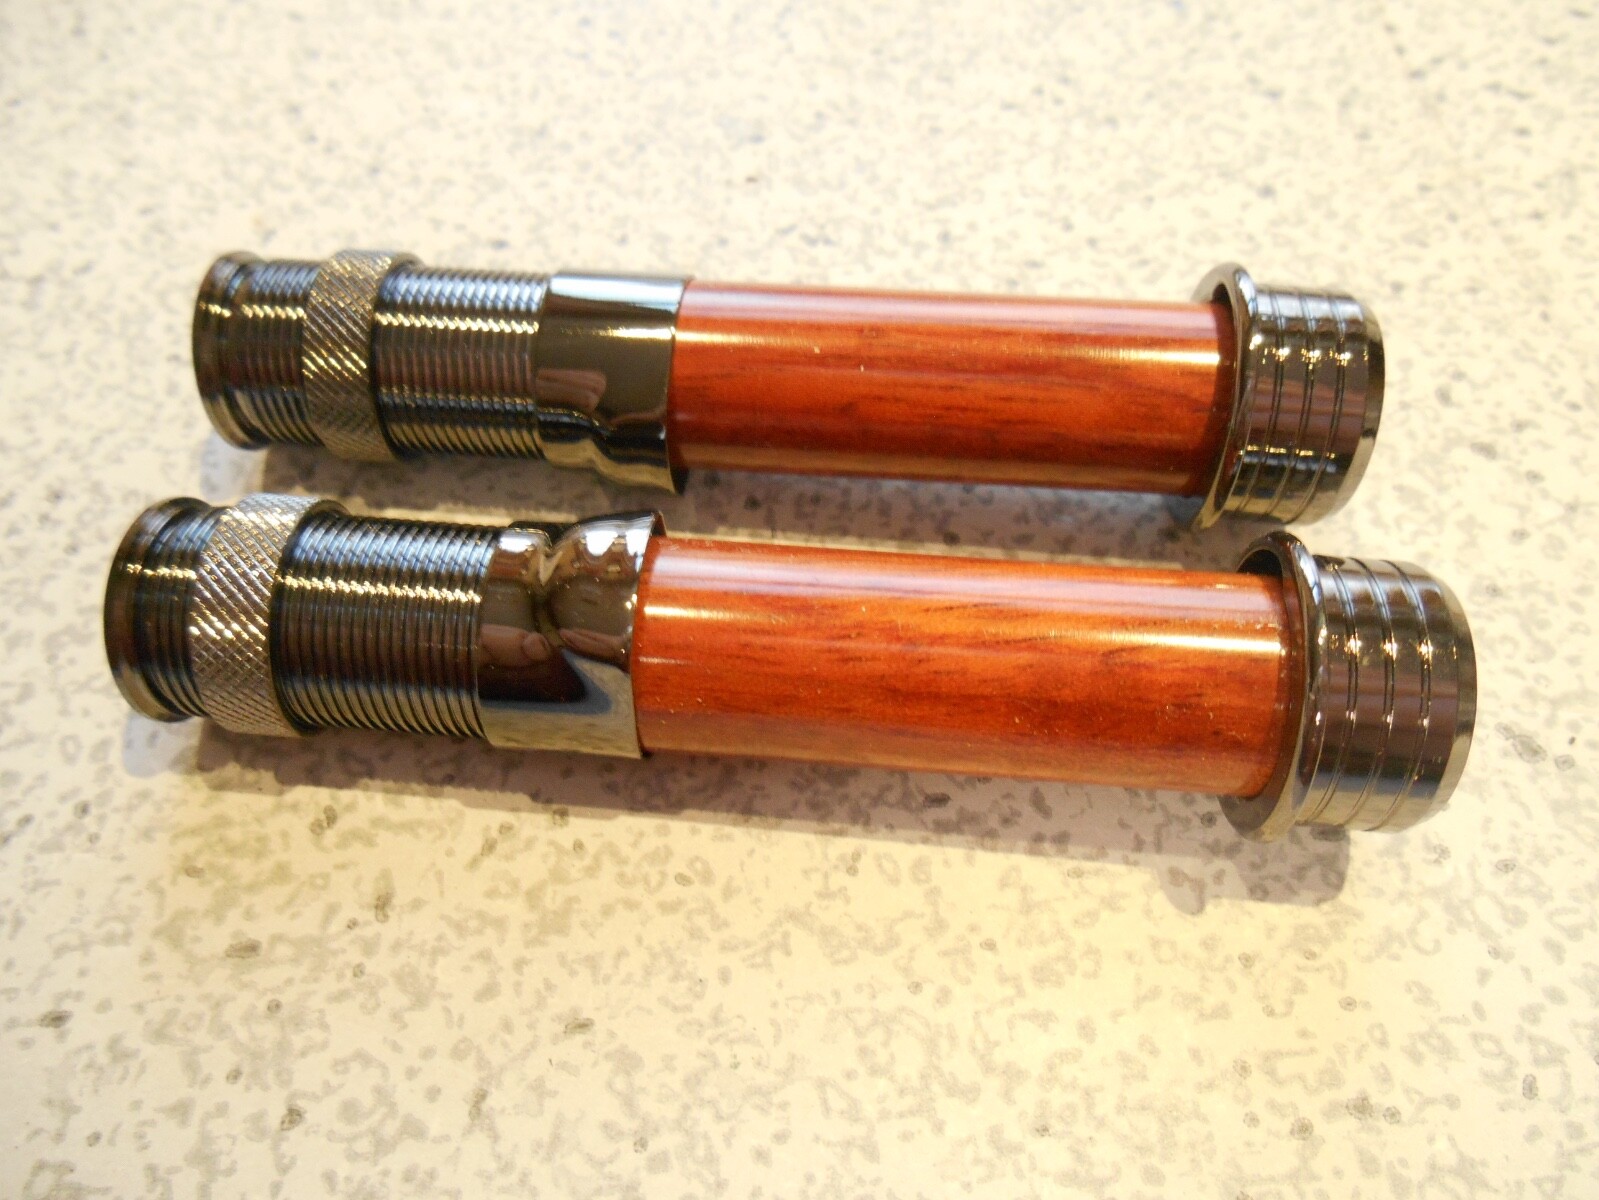
but the hardware it came with was flimsy and not as nice as the price justified. So instead, I ordered these:
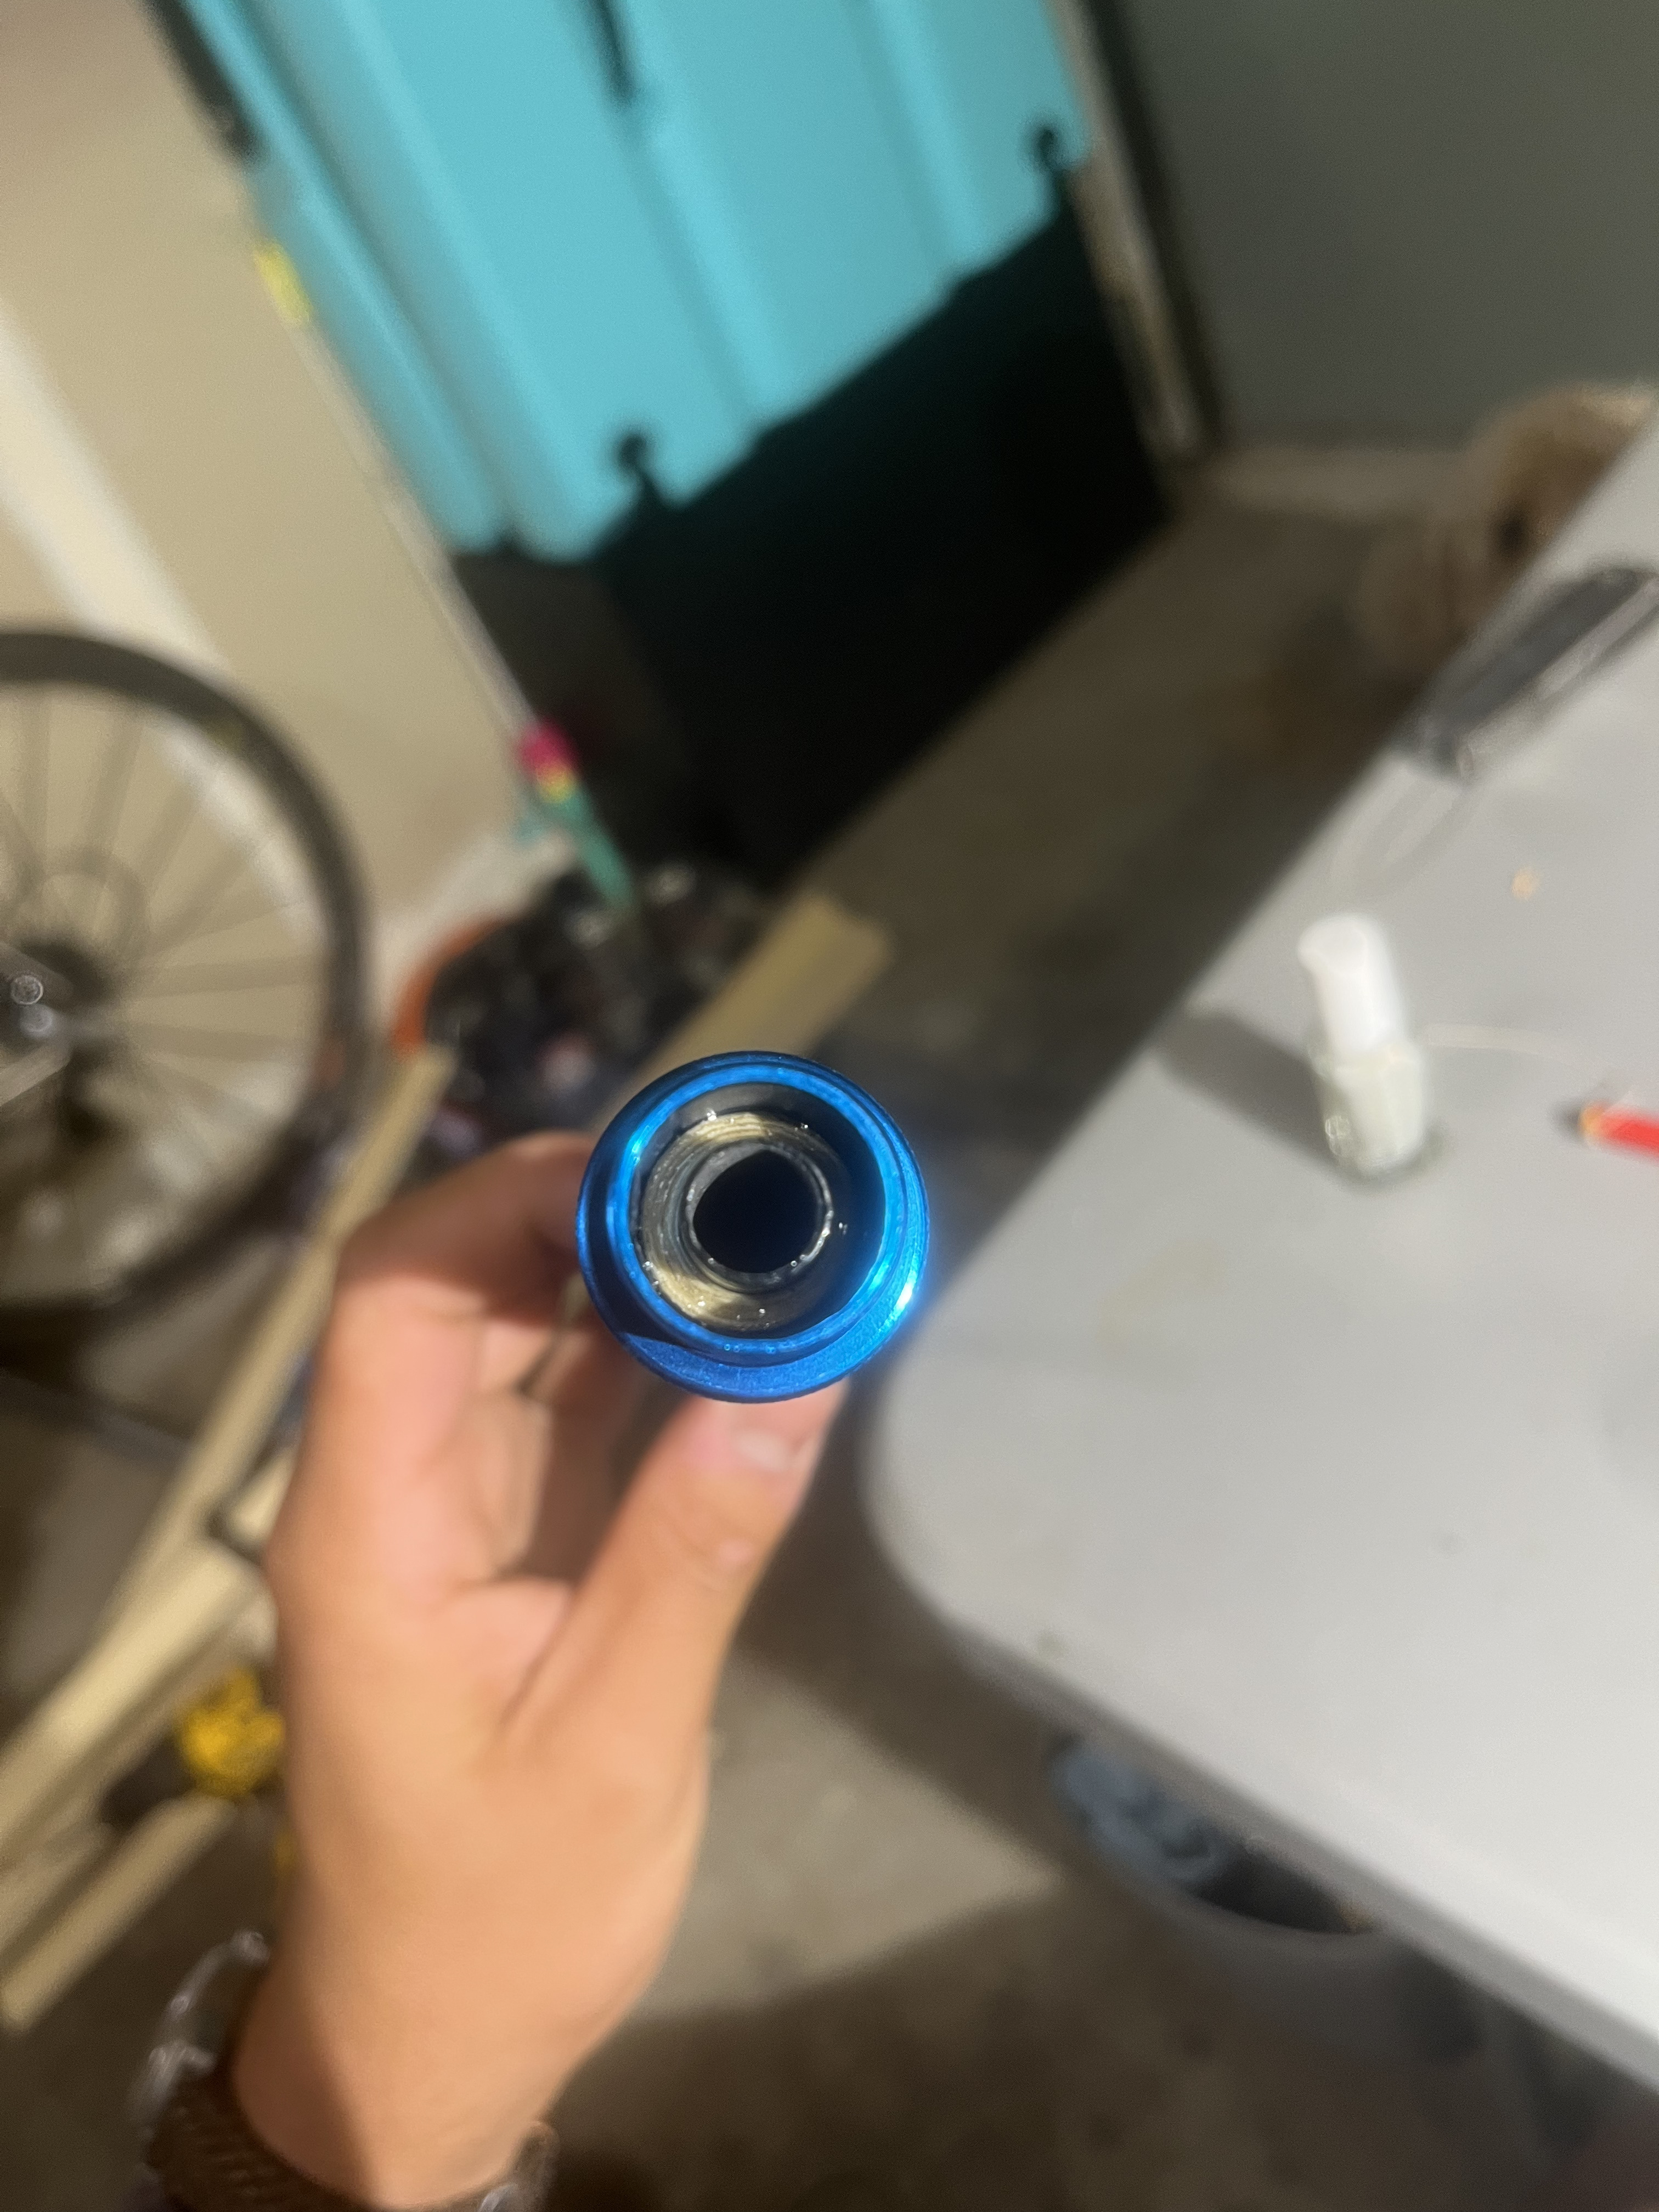
These are the blue anodized aluminum ones I ordered for my own rods:
Grip
Since these rods are custom, we are free to use any different shape of grip. Full wells, reverse half wells, cigar, etc. Because I typically use a rod with a reverse half wells, I chose to do the same for my personal rod, and then for the gift rods, I chose one full wells and another reverse half wells.
Wrapping
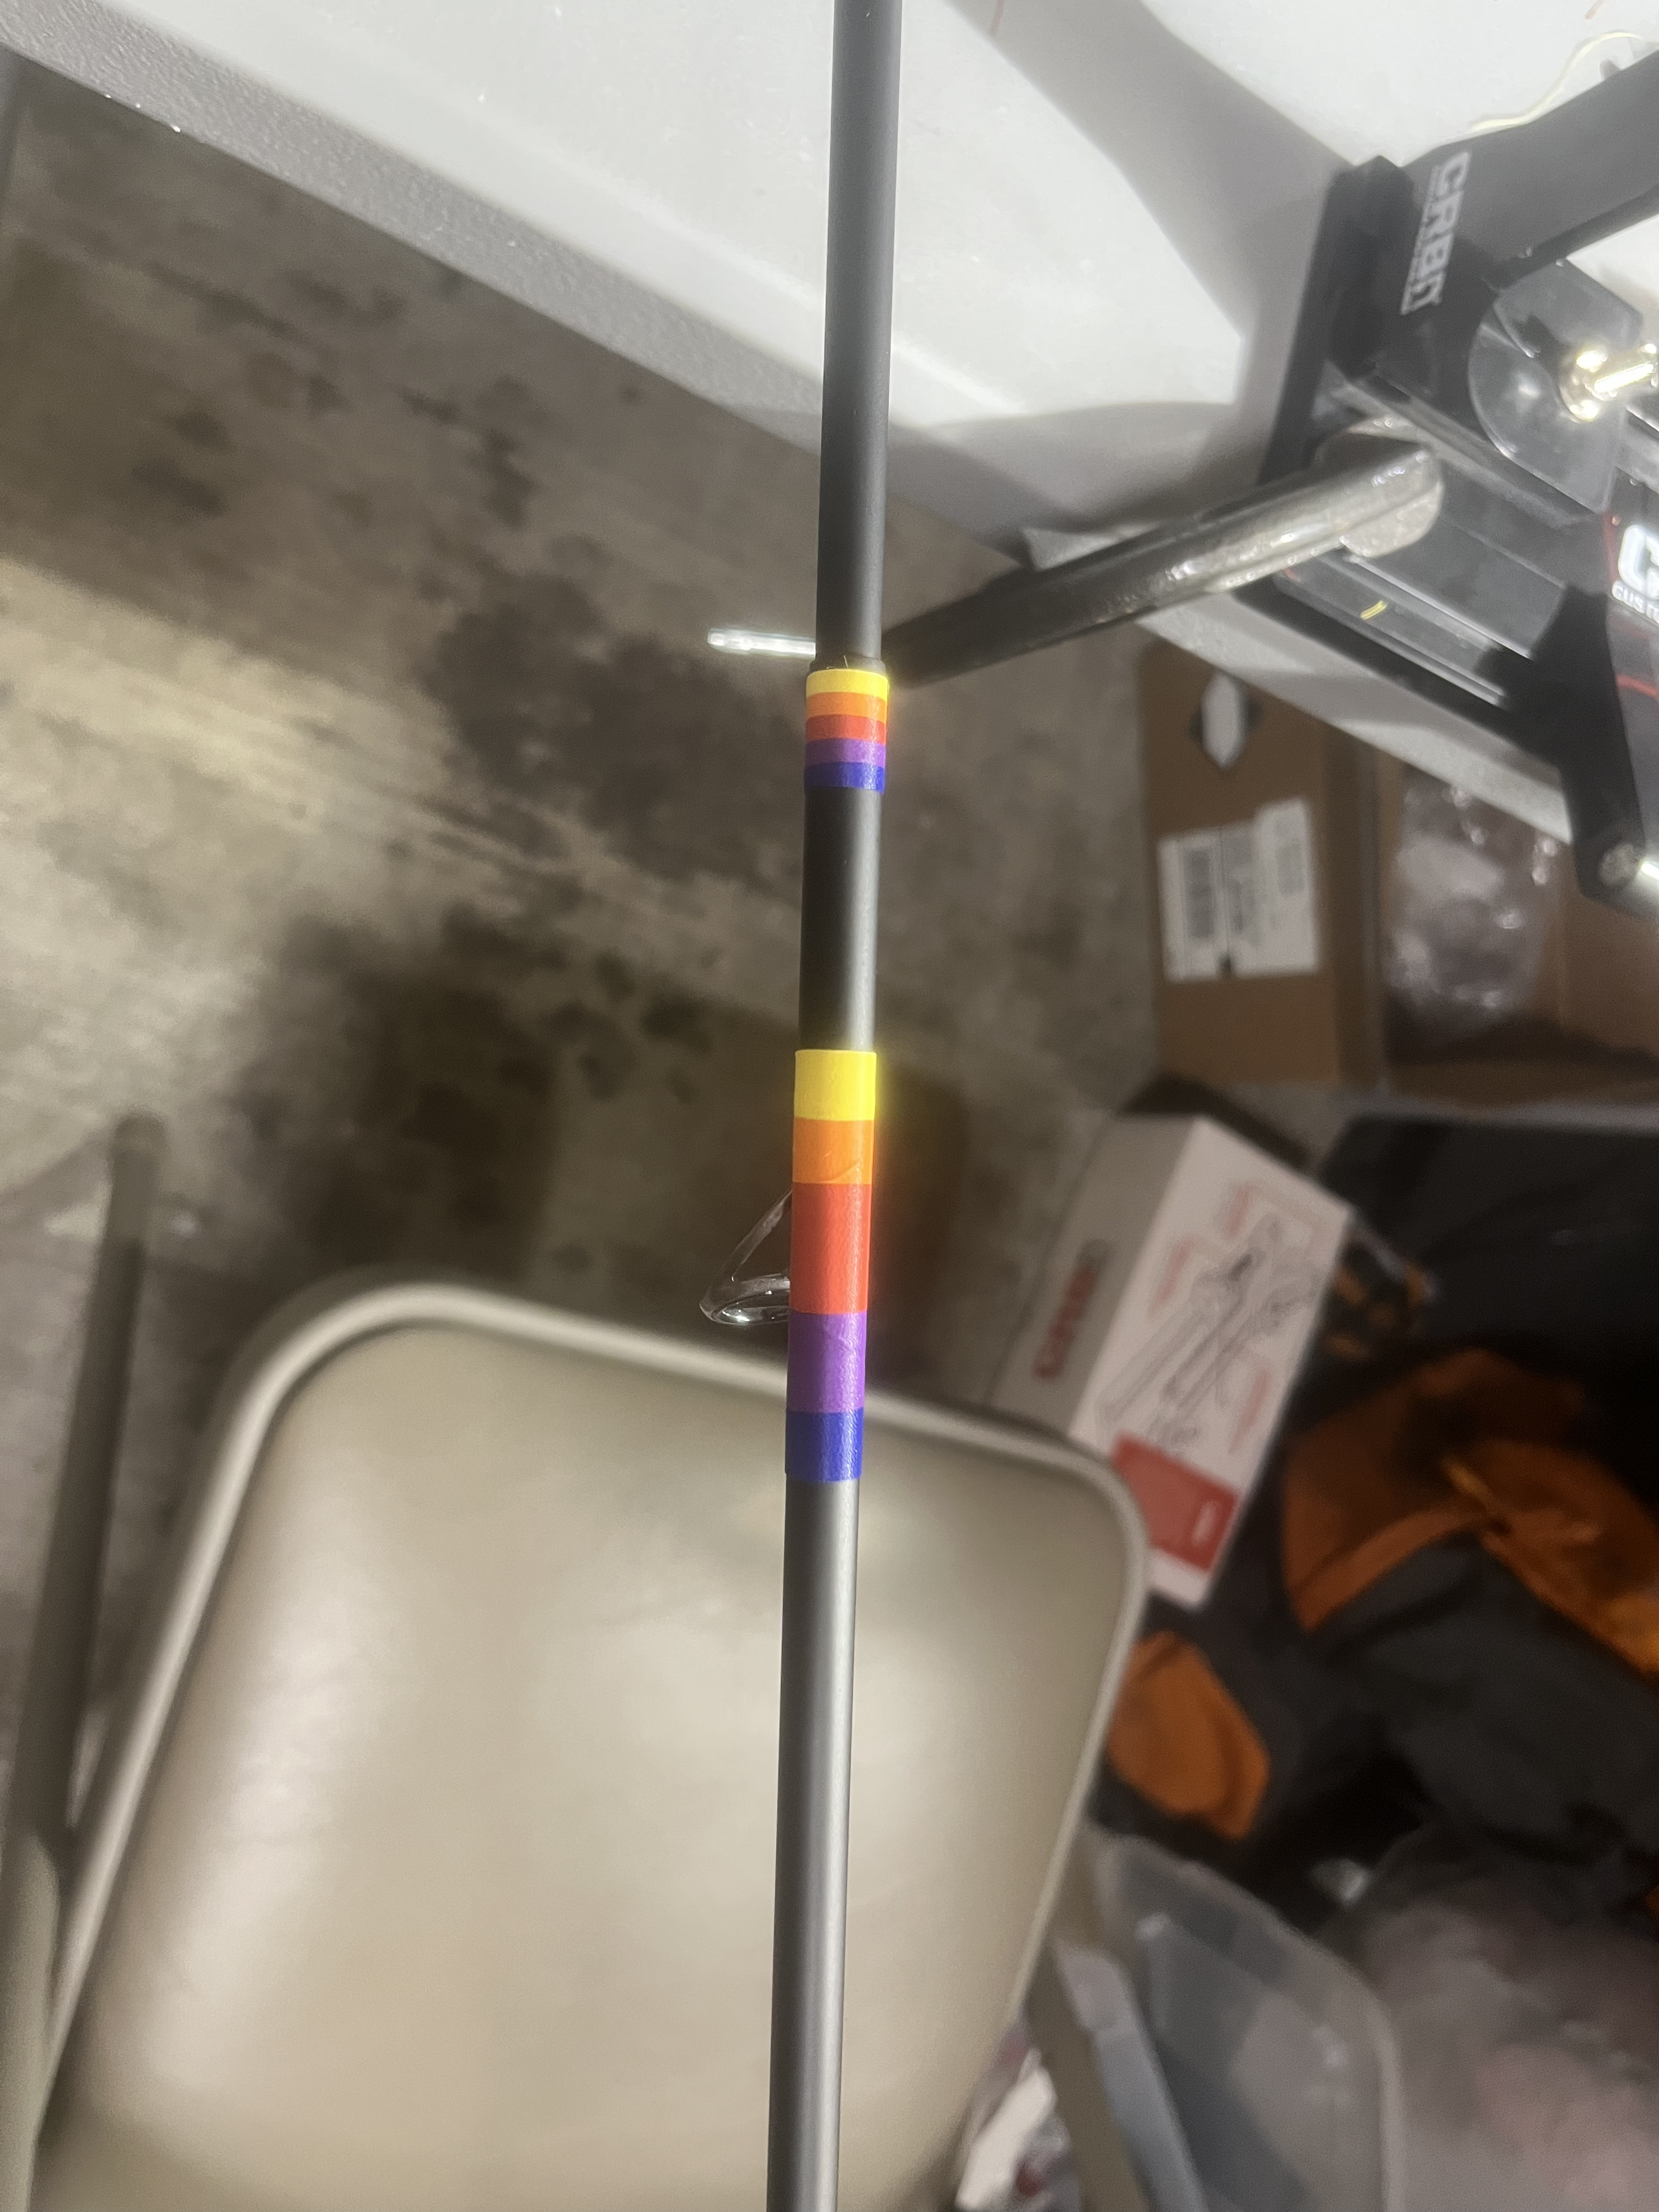
After following the same rod guide grinding steps from above, it’s time to wrap. For these rods, I chose to do a “sunset” color palette, which includes the colors: {Blurple, Grape, Mars Red, Burnt Orange, Taxi Cab}. All five of these colors are in ProWrap ColorFast size A thread.
Since the thread needs to be started and stopped at every color transition, I thought it best to keep the structural part of the wrap all one color. Thus, the pattern is
yellow (cosmetic) - orange (structural) - red (under guide) - purple (structural) - blue (cosmetic)
To do one of the guides with all 5 colors, it took around 20-25 minutes, so since each rod has 11 guides + butt wrapping, that would mean way too much time. So instead, for the guides that are further from the caster, I moved to doing double color wraps (one color for the butt end, one color for the tip end). This speeds up the process, and if I continue the same color gradation, it looks pretty good as well.
Once done with the wrapping itself, I burnished each wrap with a pen cap to flatten the threads, and made sure that all of the tag ends were tucked properly. Here’s what the wraps ended up looking like:
Finished product
Applying rod finish
Now that the guides are attached to the rod, I started to apply the rod finish. This is similar to how I applied the finish to the nymphing rod, but I spent a little more care focusing on getting even and not too thick application on each wrapping. I applied the finish while on the rod turner, so that once it is done, I don’t need to move it at all and potentially disturb the epoxy.
Drying
The drying is the easiest part - turn the turner on, and walk away! I left them for at least 24h on the turner, just to ensure that the finish had hardened to the point that I did not need to worry about transporting the rod around. After drying all three of the rods, I presented them to my friends, and they seemed quite pleased! I am happy that my first run of custom rods turned out well.
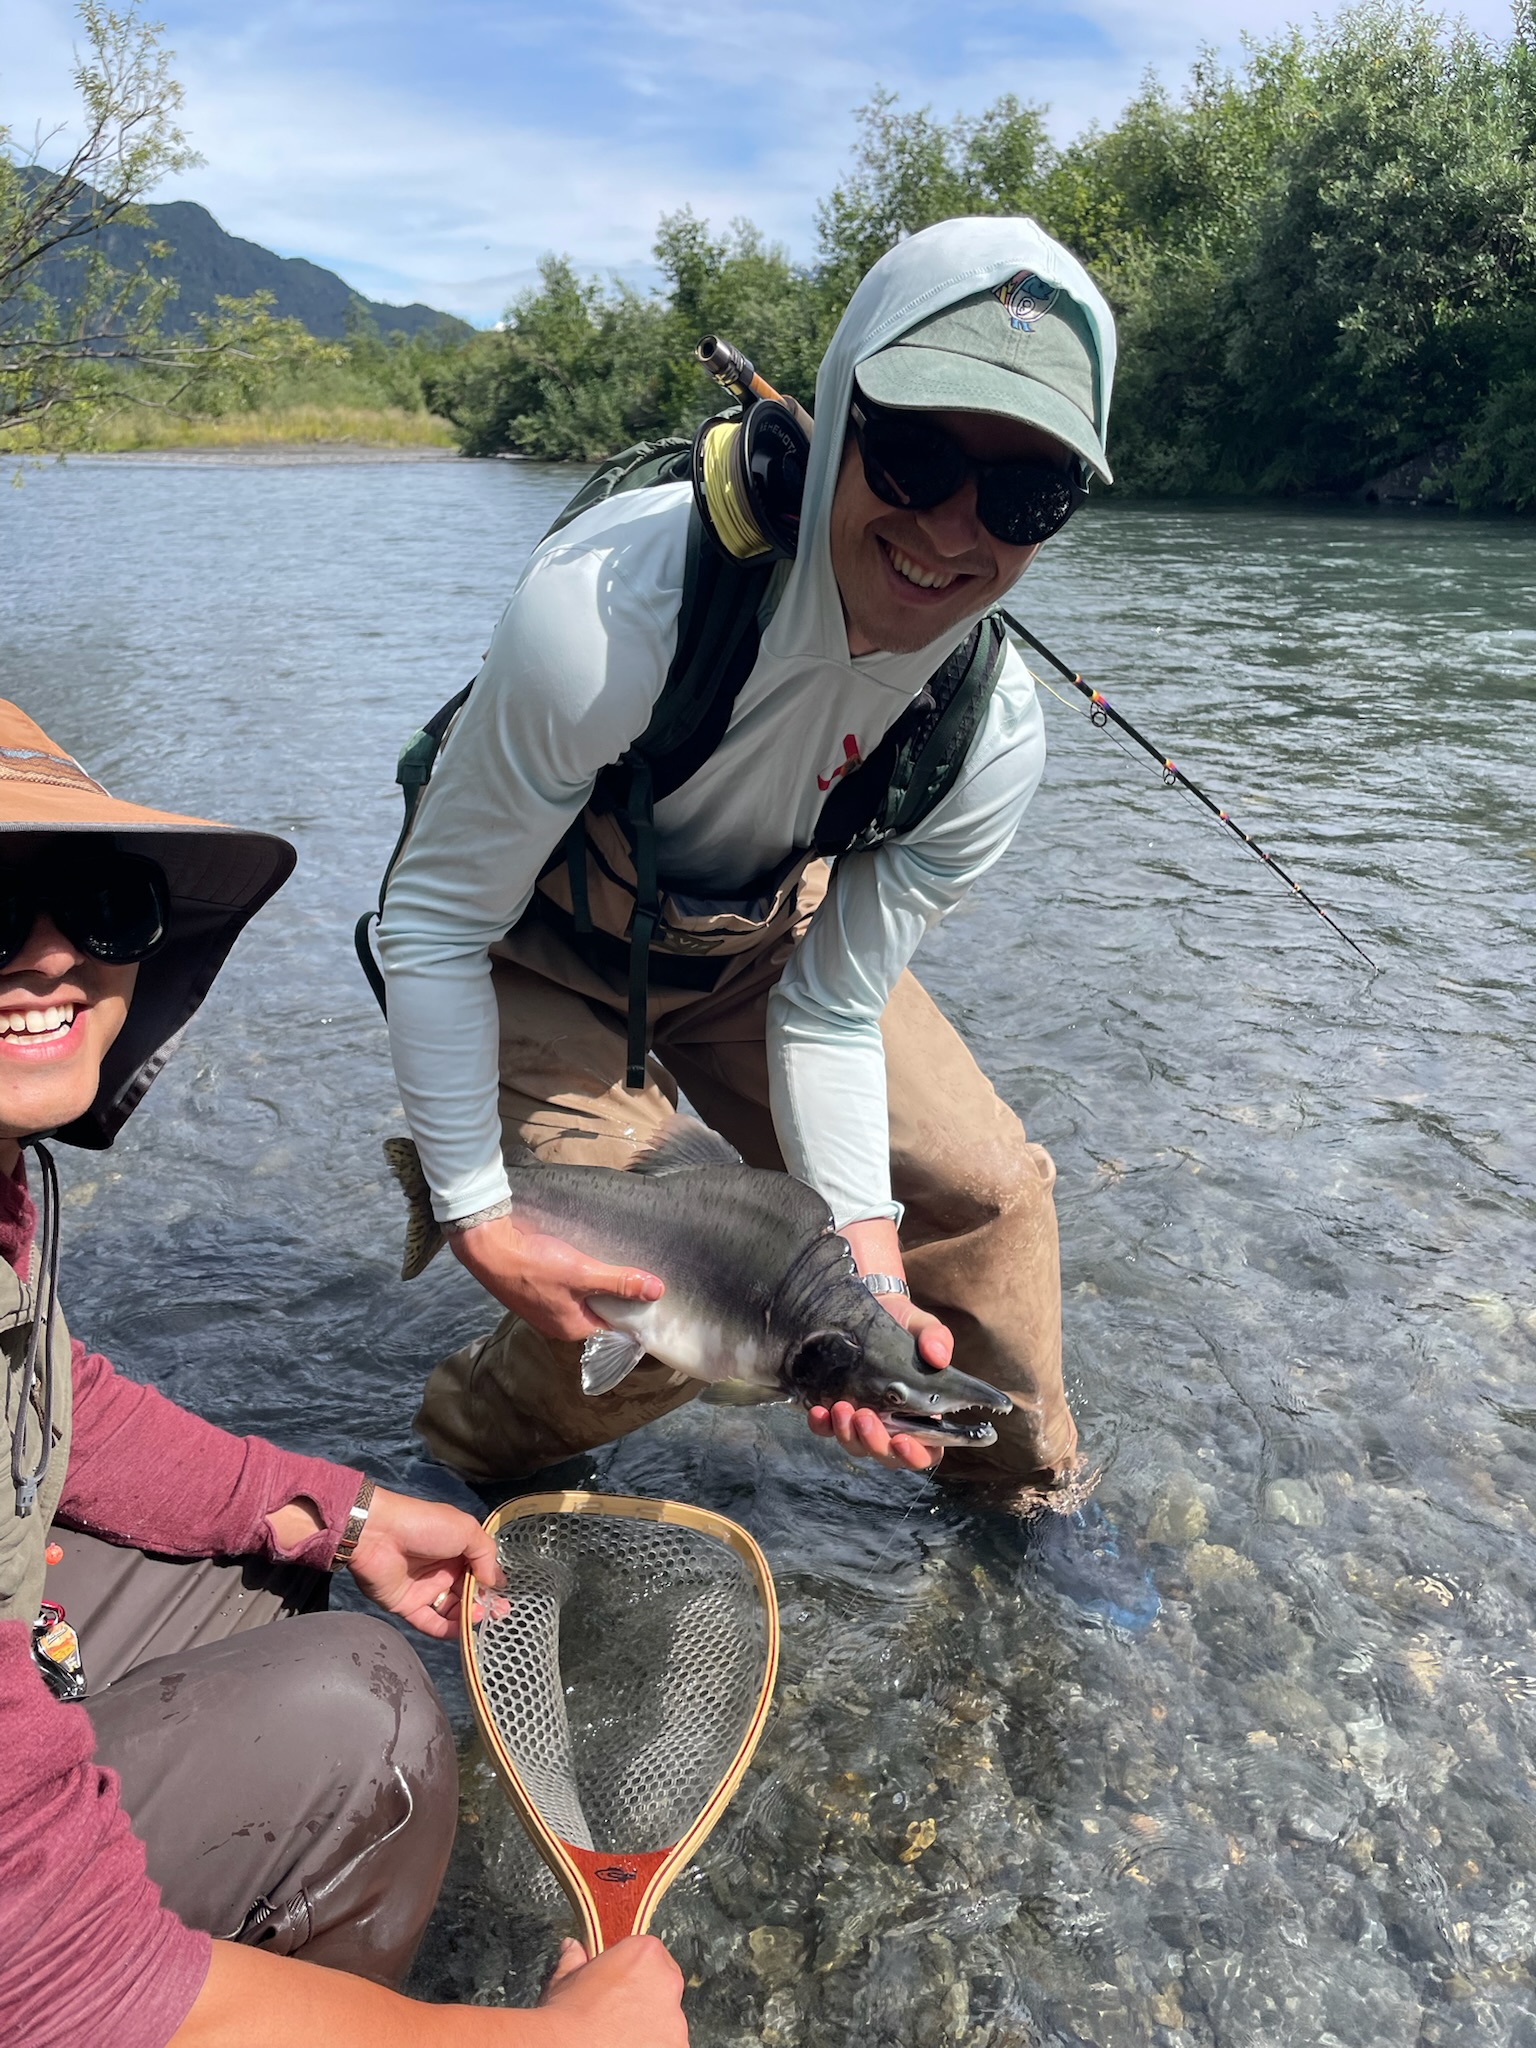
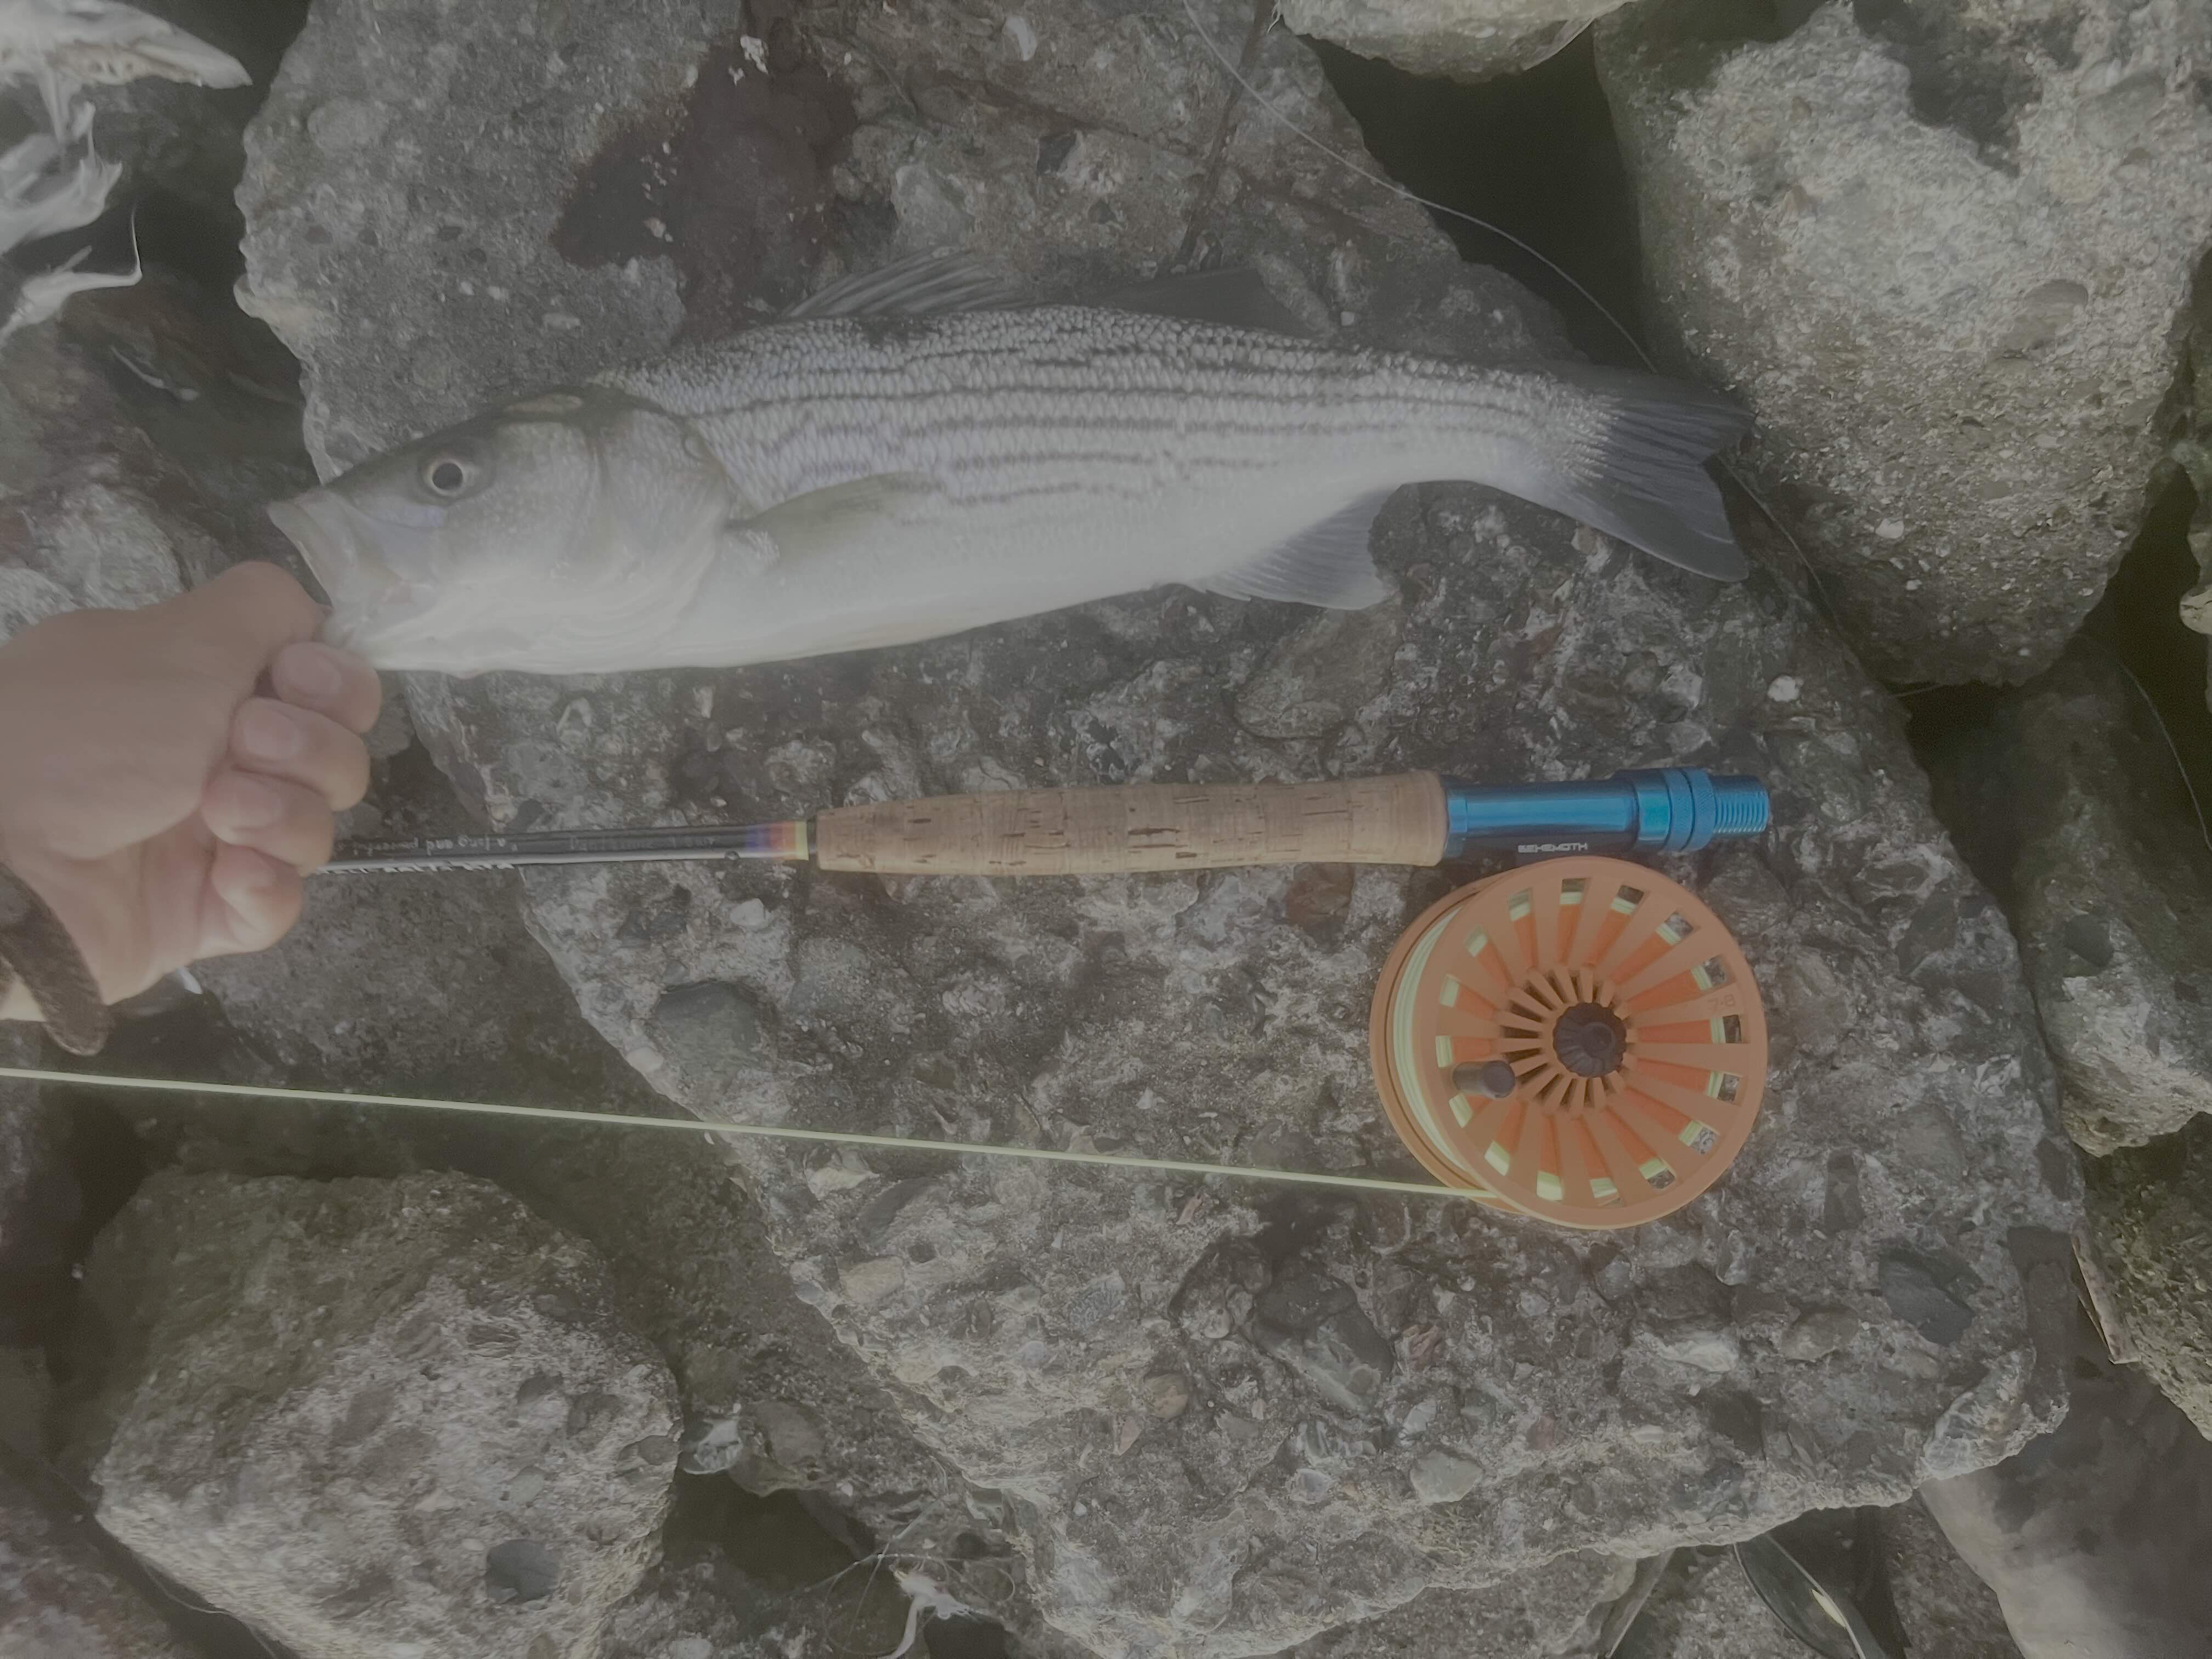
The catch
Here’s some pictures of pinks we caught on our Alaska trip:
Austin:
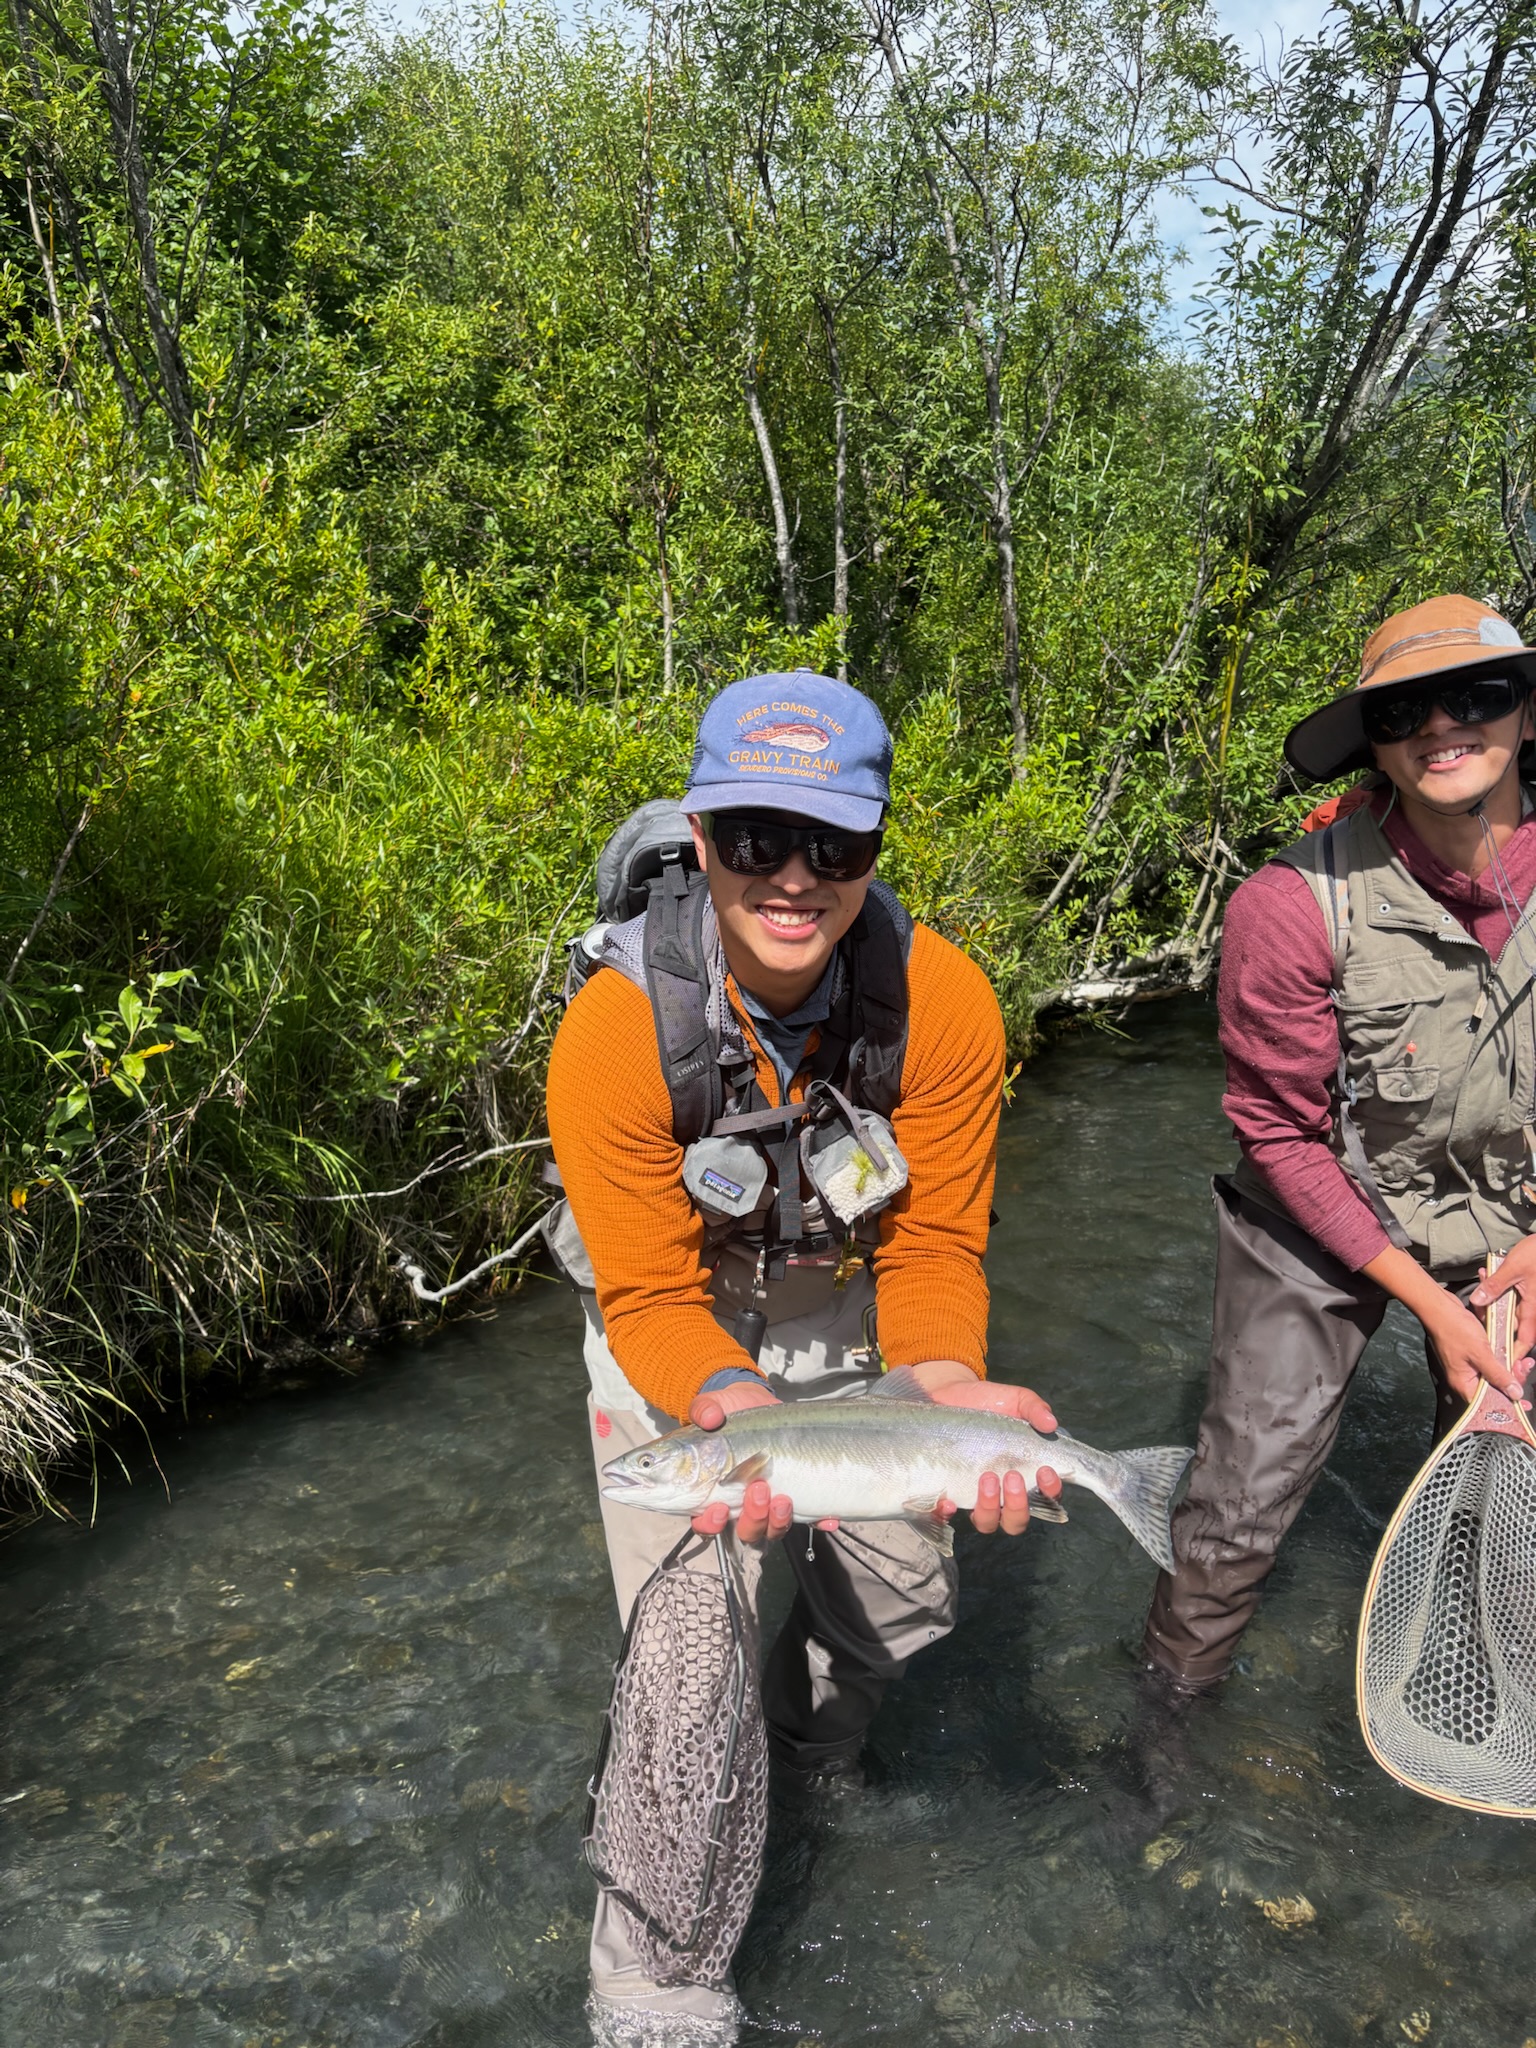
Me:
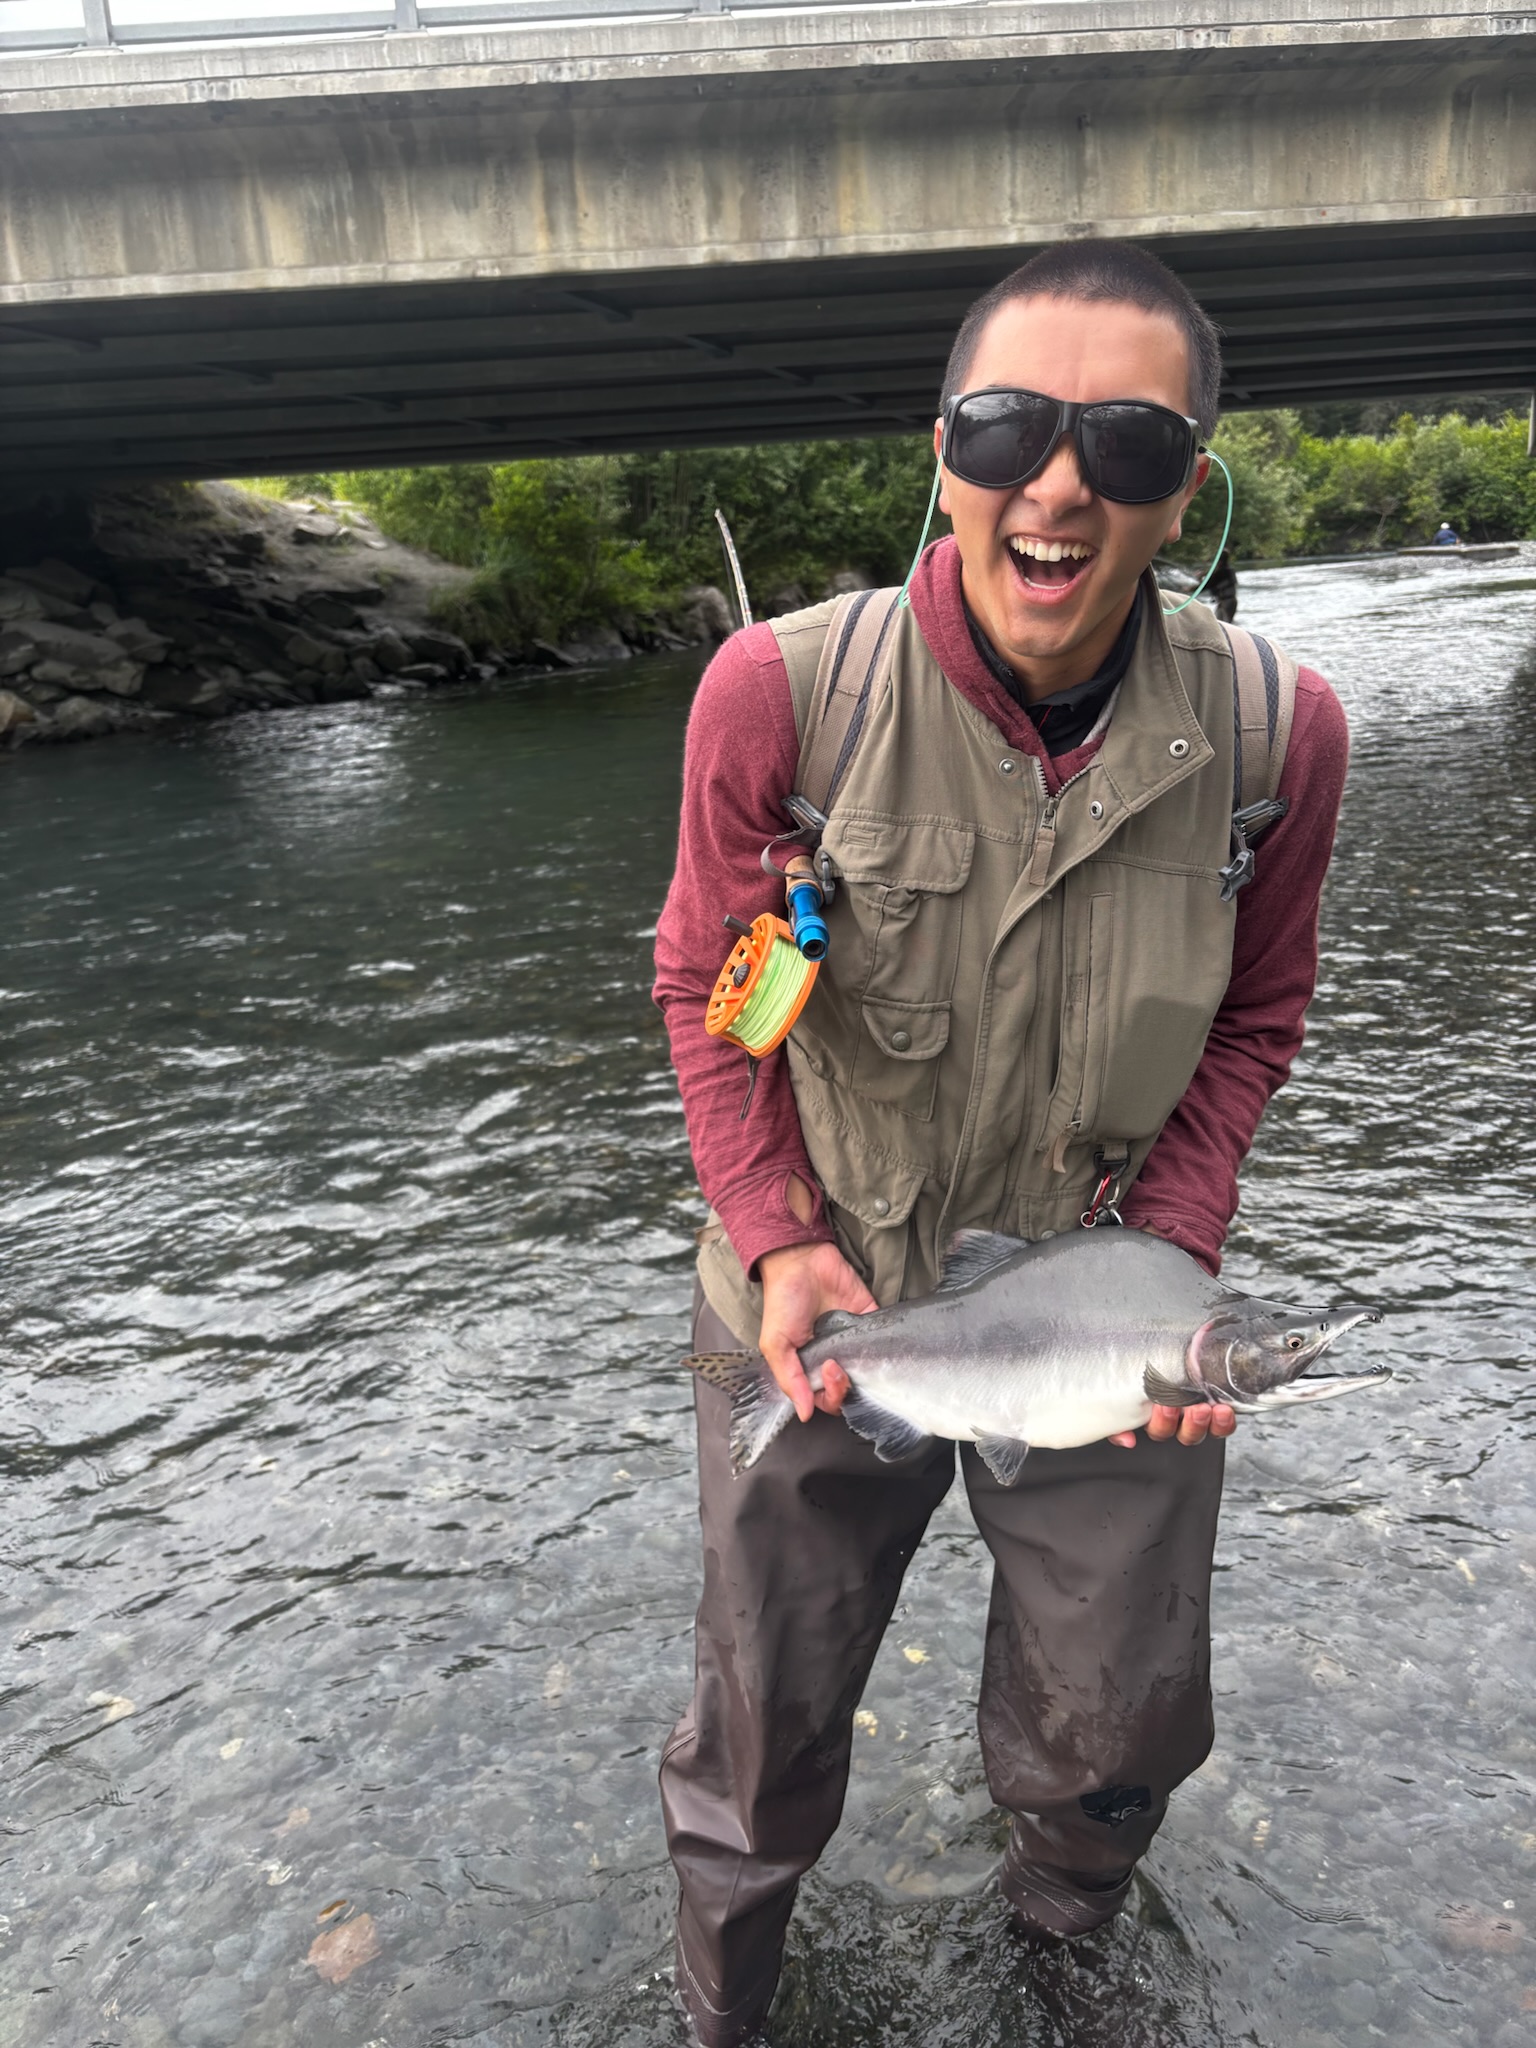
Mitchell:
Awesome fishing with great friends on some cool rods. Here also a striper that I caught at the Hayward shoreline:
Lessons for next time
Repeating the same process for all three rods was tedious. I’m not sure if I could have made it any more efficient, since as one rod was drying on the dryer I was wrapping the next, but there are some slight process modifications that I want to remember for next time. Firstly, when flowing the epoxy rod finish to remove the bubbles and encourage even spreading, I think I should avoid a butane lighter and use an alcohol flame instead. The butane lighter left some carbon deposits into the rod finish itself, which doesn’t look great. Next, if I have more time to do the wrappings, I think it is better to do a two-stage epoxy approach, instead of applying all of the finish in one shot. This means that when the epoxy is applied, it is possible to get more even spread and less chance of pinholes getting through. Since I did the 8wts in one go, I have noticed that underneath some of the wrappings (especially the stripping guides) that there is some rust beginning to form, so the two part approach should help mitigate that.
9’ 5wt Competition Casting Rod
Goal
The goal for this rod is to be a lightweight casting-pond rod that provides good action to make tight loops for use in trout dry fly games. You can read more about this format here.
Material
For this rod, I wanted to choose a little higher-quality blank than I normally build with. Since North Fork Composites (one of the leading fly rod blank builders, Gary Loomis’ brand) has a large selection of blanks and had a mega sale going on, I picked up one of their “Classic Series” graphite blanks (with designator F 905-4M), in a medium action. This medium action helps me to keep a consistent and small loop, which improves my accuracy.
For the reel seat, I selected a sliding band seat. Since this rod isn’t really one that I would use for fishing, I thought it a good time to try out one of the sliding band seats, which hold the reel foot in place by wedging the ramp of the foot with a ring (the band). These reel seats have a cleaner look that threaded seats, and potentially save on weight.
For the grip, I selected a short 5.5" cigar grip, since with competition casting, I want to eliminate as many variables as possible. The small grip forces my hand to be in the same place every time I pick the rod up, so it should help with casting consistency.
For the guides, I selected single-foot guides, in a dark color. Single foot, since they have the potential to build a lighter rod, and a dark color because it matches well with the raw graphite blank. These don’t matter as much, so long they can carry the line properly.